Let's get started with your book's front matter
I will assume that you are using the world's most popular word processor Microsoft Word. If you are not using Word then Libre Office Writer is the best free alternative and works in a very similar way. You could also use the online version of MS Word provided you have an Internet connection. However, the free online version of Word doesn't give you the full features of the desktop version. It's worth paying the £7.99 ($6.99 US) monthly subscription for Microsoft 365 Personal to get an up-to-date copy of MS Word and all the other Office tools an author needs.
I suggest you start by formatting your manuscript as a paper book. Later we'll convert this to an ebook.
The easy method As already said, by far the simplest way of setting page size, and indeed front and back matter is to use a book template. It's better to work through the whole process yourself first since it will give you a better understanding of what's needed.
The manual method
This is far more complex than the easy method but it will help you understand more about what's going on.
Step 1 - Open MS Word and create a new blank document. Set the document layout as in the previous page. Alternatively, if you already have your book manuscript in a Word file then start with a copy of it and set the layout of that to the correct size. Never use the original since at this stage it's possible to mess up and destroy all your work so far!

Step 2 - Fixing MS Word display Although MS Word is probably the best word processor, it's NOT perfect, (despite me telling Microsoft many times how to improve it) since there are some things it won't do. One of these things is to start a book or booklet with an opening page on the right hand side of a two page spread both in what the writer sees and in what is printed out.Use the zoom control at the bottom right of the MS Word window to see one
Let me get you to do a simple experiment to show you what I mean.
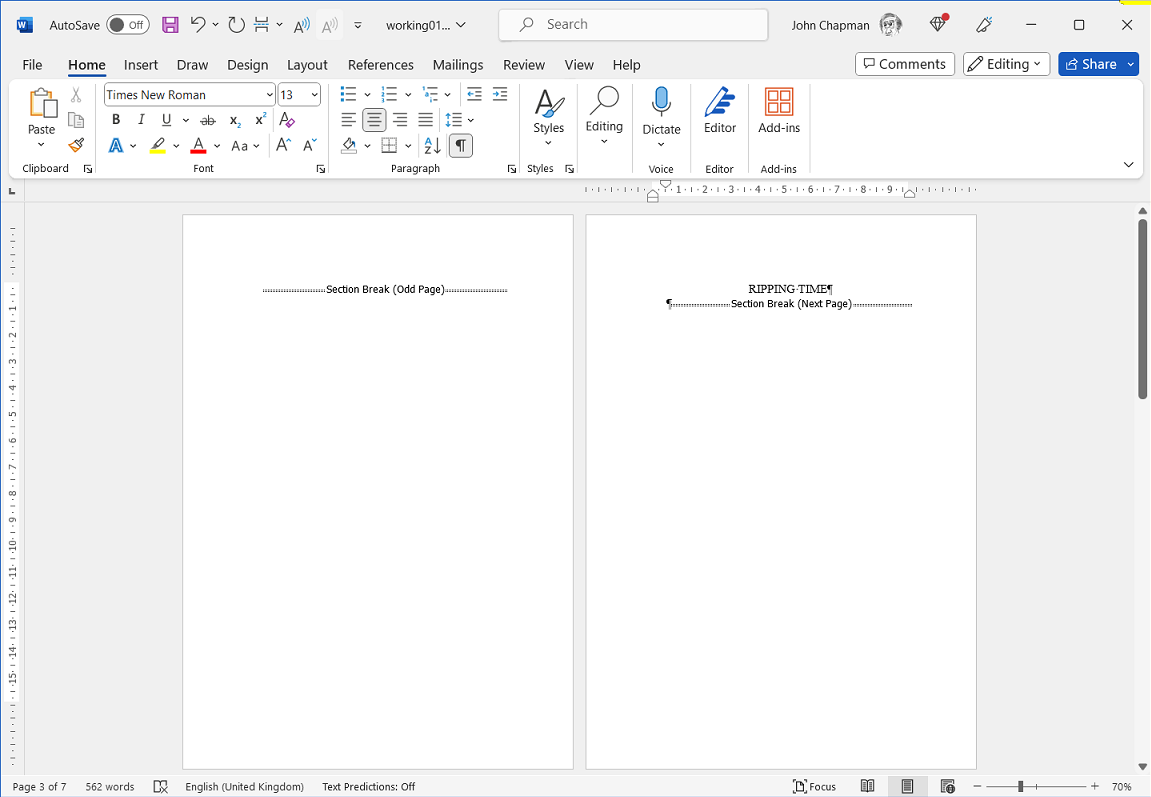
Take a sheet of paper and fold it in half to make a four sheet booklet. Number each page of the booklet from 1 to 4. Then open it out and you will see that page 1 is on the right hand side of the sheet. If you now view your 'working01.docx' file in a two page spread you'll see that the first page is a left hand page - see the above illustration. The very first word processor I used back in 1981 would allow the document to start on a left or right page but the current version of MS Word won't do that. It will only allow you to start on a left hand page. Left hand pages should be even page numbers and right hand pages should be odd page numbers. We'll have to fix that by inserting a temporary blank page. As we do that we'll customize the quick access toolbar to allow you to quickly insert section breaks.
Move your pointer to a blank area of the Quick Access Toolbar and right click it. From the menu which appears select 'Customize Quick Access Toolbar...'
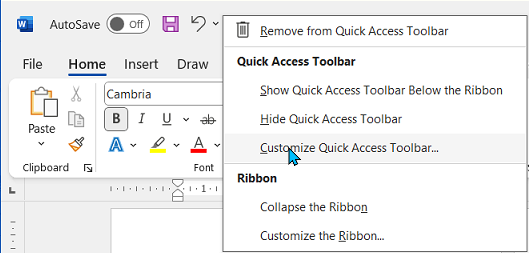
Then from the window which appears select 'Insert Page and Section Breaks' and click 'Add.' While I'm doing this I add other frequently used icons also. Clicking 'OK' will add the icons to the quick access toolbar.

Move your cursor to the very beginning of your document, in front of where the C of Chapter 1 is (or will be). Use the Insert Page and Section Breaks icon you added to insert a 'Section Break (odd page)' at this point. Then insert a 'Section Break (Next Page)'. You'll now have two blank pages at the start of your document. To see them in a two page spread use the zoom control at the bottom right of the Word window.
If you find this guide useful...
Can you help me out?
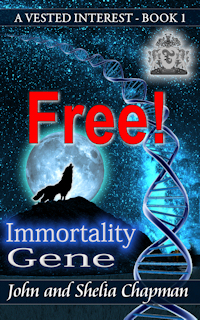
If you find these pages useful you can return the favour by downloading a FREE ebook from Amazon - even if you don't read it, it will help our rankings! I think you'll probably like it though.
It's the first book of a series of 9 books (so far) which tell the story of how life on Earth was saved from a cataclysmic extinction when a rogue planetoid collides with Earth in 7141. This first book deals with how humanity was made immortal, giving us the incentive to do something about an event so far in the future.
Take a touch of humour, add some genetic science and nanotechnology. Steep with conspiracy and stir in murder and despair. Season with romance between three people in a secret location. Garnish with morality.
The result is 'Immortality Gene', the first in a novel series by John and Shelia Chapman. The ebook of book 1 is FREE and available at multiple retailers
Get it from your favourite store
Or maybe a free online interactive adventure story?
Back in 1982 early text only adventure games were being written for home computers. One such game was 'Castle of Riddles' written by Peter Killworth and published by Acornsoft. Now it's been re-written and greatly expanded with added images and sound. Play it on your computer, tablet or even a phone.
Check it out at https://jaydax.co.uk/corr
Hint: Remember the story about Goldilocks and the three bears? They made it into this game and they are angry. Stay away from them.
On a more serious theme...
- Did you know that an average size pine tree takes 20 years to grow?
- From that tree you can make 1500 toilet paper rolls.
- An average person uses 127 rolls of toilet paper a year
- In the same area as that tree you can grow bamboo and it takes 3 years to grow to maturity.
- You can make toilet paper from bamboo - more in 20 years than that tree produces.
- No bleach used
- No plastic used
- Sequesters more carbon dioxide
- Costs less and is delivered to your home
Find out more at the Naked Paper website.
 You can display hidden codes in MS Word documents using the show/hide pilcrow icon in the Home toolbar. That's the ¶ icon. With it selected:

You'll also see where page and section breaks have been added.
I normally work with Show/Hide turned on. The symbols won't be printed. If it distracts you then only turn it on when you need to check.
The half Title
Create a Half Title page on the second of the two blank pages you created. Click the Show/Hide icon (a pilcrow symbol - ¶) and the Section Break codes will become visible. In front of the second one type in Normal style the title of your book in capital letters. In my example it's RIPPING TIME.
 Normally I suggest people avoid typing in all capitals. As a one-time teacher I learnt that doing so makes text harder to read since the words lose their shape. Perhaps that's why lawyers use block capitals for the important bits of contracts?
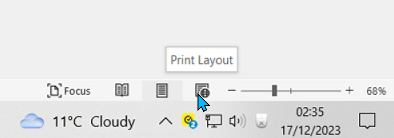
To display a two page spread use your pointer to select the 'Print layout' icon at the bottom right of the MS Word window and then scale the window to about 70%.
The next page
The next page of your front matter should either be a frontispiece, an epigraph or a blank page. Remember a frontispiece is an illustration appropriate to your book. Most books today don't include one so we'll add a 'Section Break (Odd page).'
The title page
You should now be on the page where your main book title will be. At this point you'll need to enter your book series title (if you have one). That would be in Subtitle style'. In the next line add your book title in 'Title' style. On the next line in Subtitle style add your subtitle (if you have one) and then your author name. Many authors then add the year of publication and the location they write in in normal centered text. eg.
London 2010
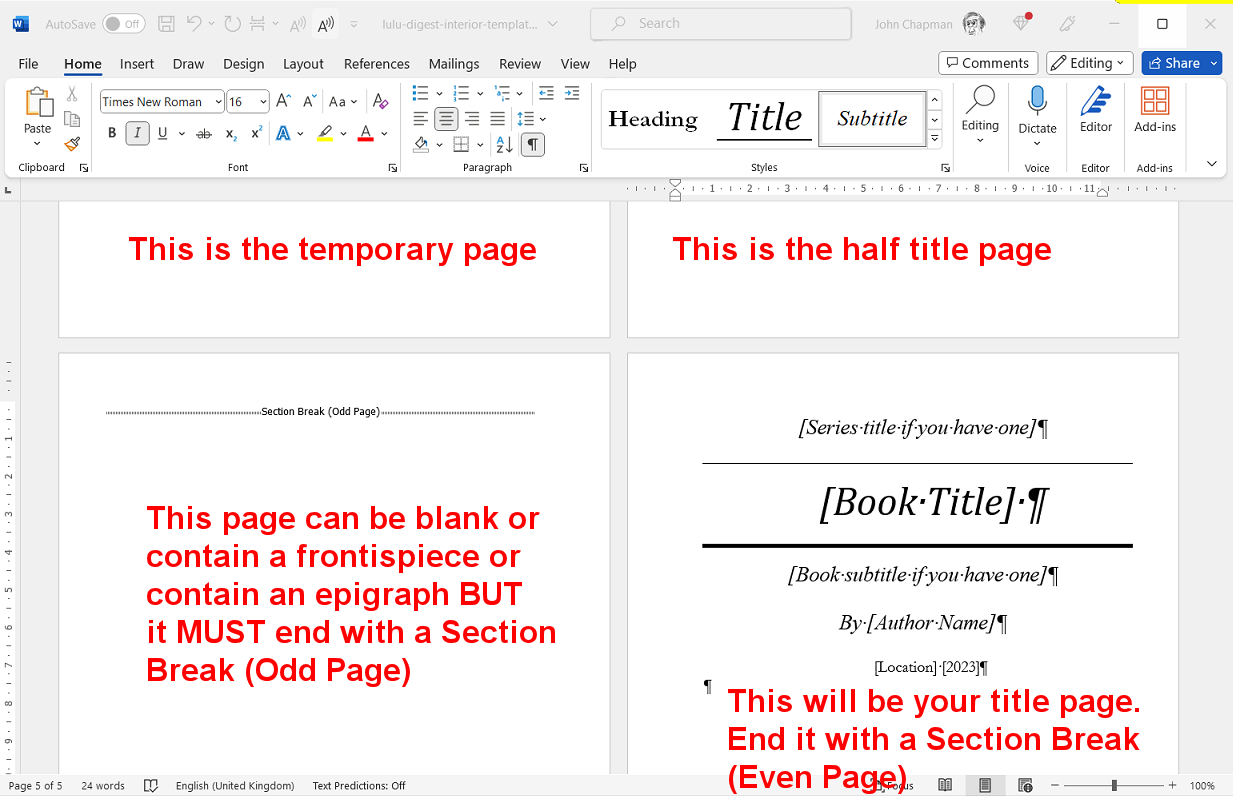
After you have entered the text of your title page with a 'Section Break (Next Page)' you now need to center align the page vertically. I've seen many template pages do this by using multiple presses of the Return key but that's the wrong method and can cause problems if the document is later converted to an ebook. (That's something we will do later.)
Here's the correct method of vertical page alignment in MS Word
You'll need to know this to get the first three pages of your book aligned properly. The half title page should be top aligned - that's the default setting so we don't need to change that
Here's three pages from the front of a book I wrote (the image will expand if you click it):
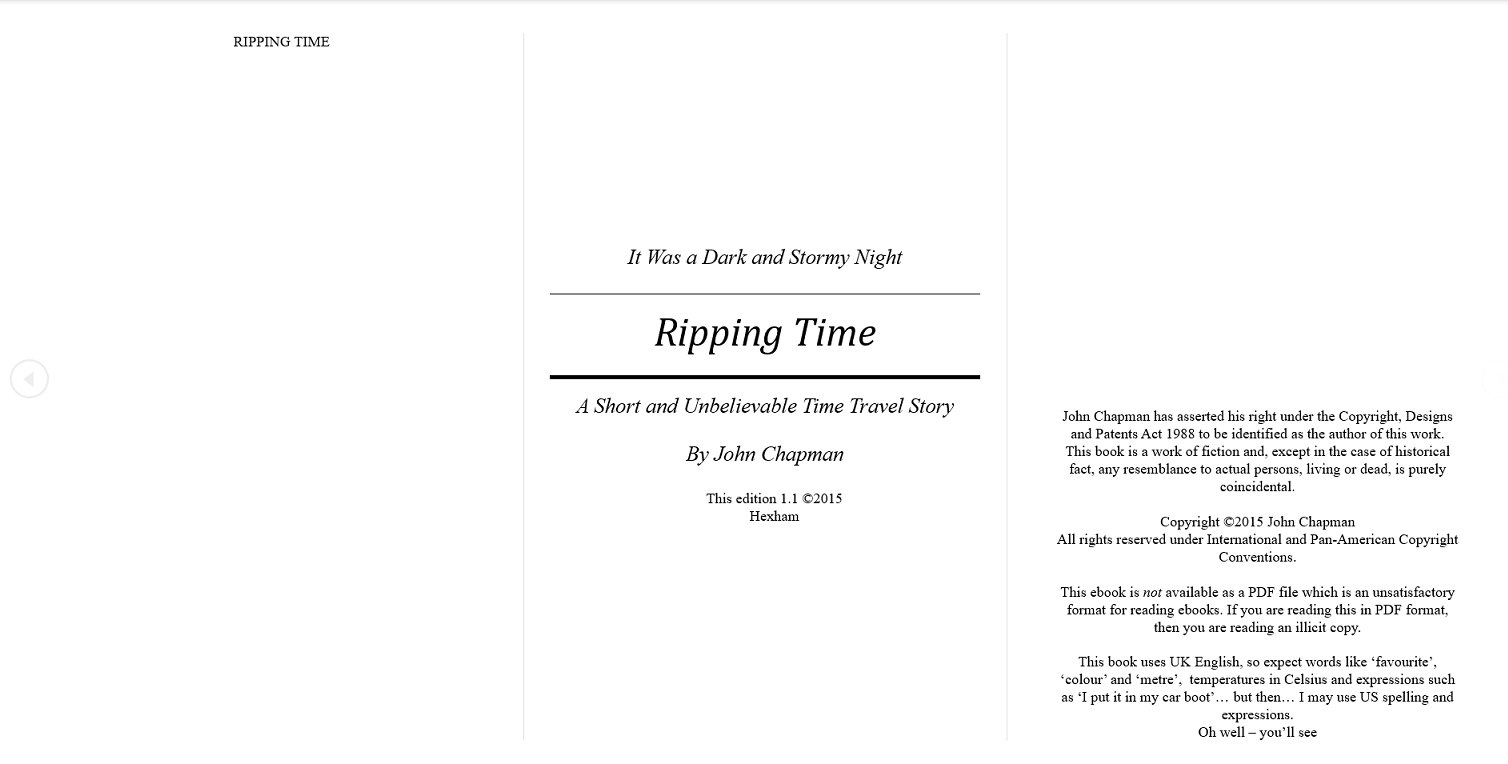
As you can see the half page is top aligned, the Title page is middle aligned vertically and the copyright page is bottom aligned. To change the vertical alignment of pages they MUST be separated by section breaks; normal page breaks will not do. You'll need to follow the steps in the following image to change the vertical alignment

(Justified alignment spreads the entire page contents out to fill the page.)
- Keep your title short, one to five words. An investigation done by Mark Coker of Smashwords found that novels with short titles were more likely to be successful. You can add a descriptive subtitle which can be longer. The subtitle can contain keywords which make finding your book much easier in a search.
For non-fiction a longer title works best but you can still add a subtitle.
More details about titles and subtitles.
I have two blogsites. An author blog, Author! Author!, at https://authorbookpromotion.blogspot.com/ It's all about promoting your work.
My other blog is a general purpose blog, IMHO, where I make suggestions for putting the world right. That one is at https://jaydax.blogspot.com/