Print on demand at Draft2digital (D2D)
It's incredibly easy to get bogged down in technicalities when producing a print-on-demand book. So let's look first at the easy way using the services of Draft2Digital.
Let's assume that all you have of your book is the actual content text. No title pages, copyright page, contents pages, epigraphs or other 'front matter'. No author biography or other end matter. Perhaps you have some of these items but are not confident you have them correctly done. If that's the case then simply make a copy of your manuscript, DON'T WORK WITH THE ORIGINAL! and you can delete those sections so that Draft2Digital can help you do them properly.
Step 1 - Cleanup your book file
- Create a COPY of the book file you produced in MS Word or your word processor docx file. I suggest you add 'd2d_print' at the end of the filename.
- Load that copy into Word and choose the file > Info > Inspect option. If you are not using MS Word your word processor should have a similar option to remove hidden data, headers and footers.
- In Word's document inspector make sure ALL the check boxes are selected even if you spent ages adding headers and footers, you're going to remove them!
- Confirm you want to remove these items and then re-save the document.
Step 2 - Starting a new book
- Go to https://draft2digital.com and create an account (free) or logon if you already have an account. You'll have to use your real name, not a pen name.
- Click the button 'Add new book'.
- On the next screen select 'START PRINT BOOK'
- You'll get this screen (you can click the image to see it full size):
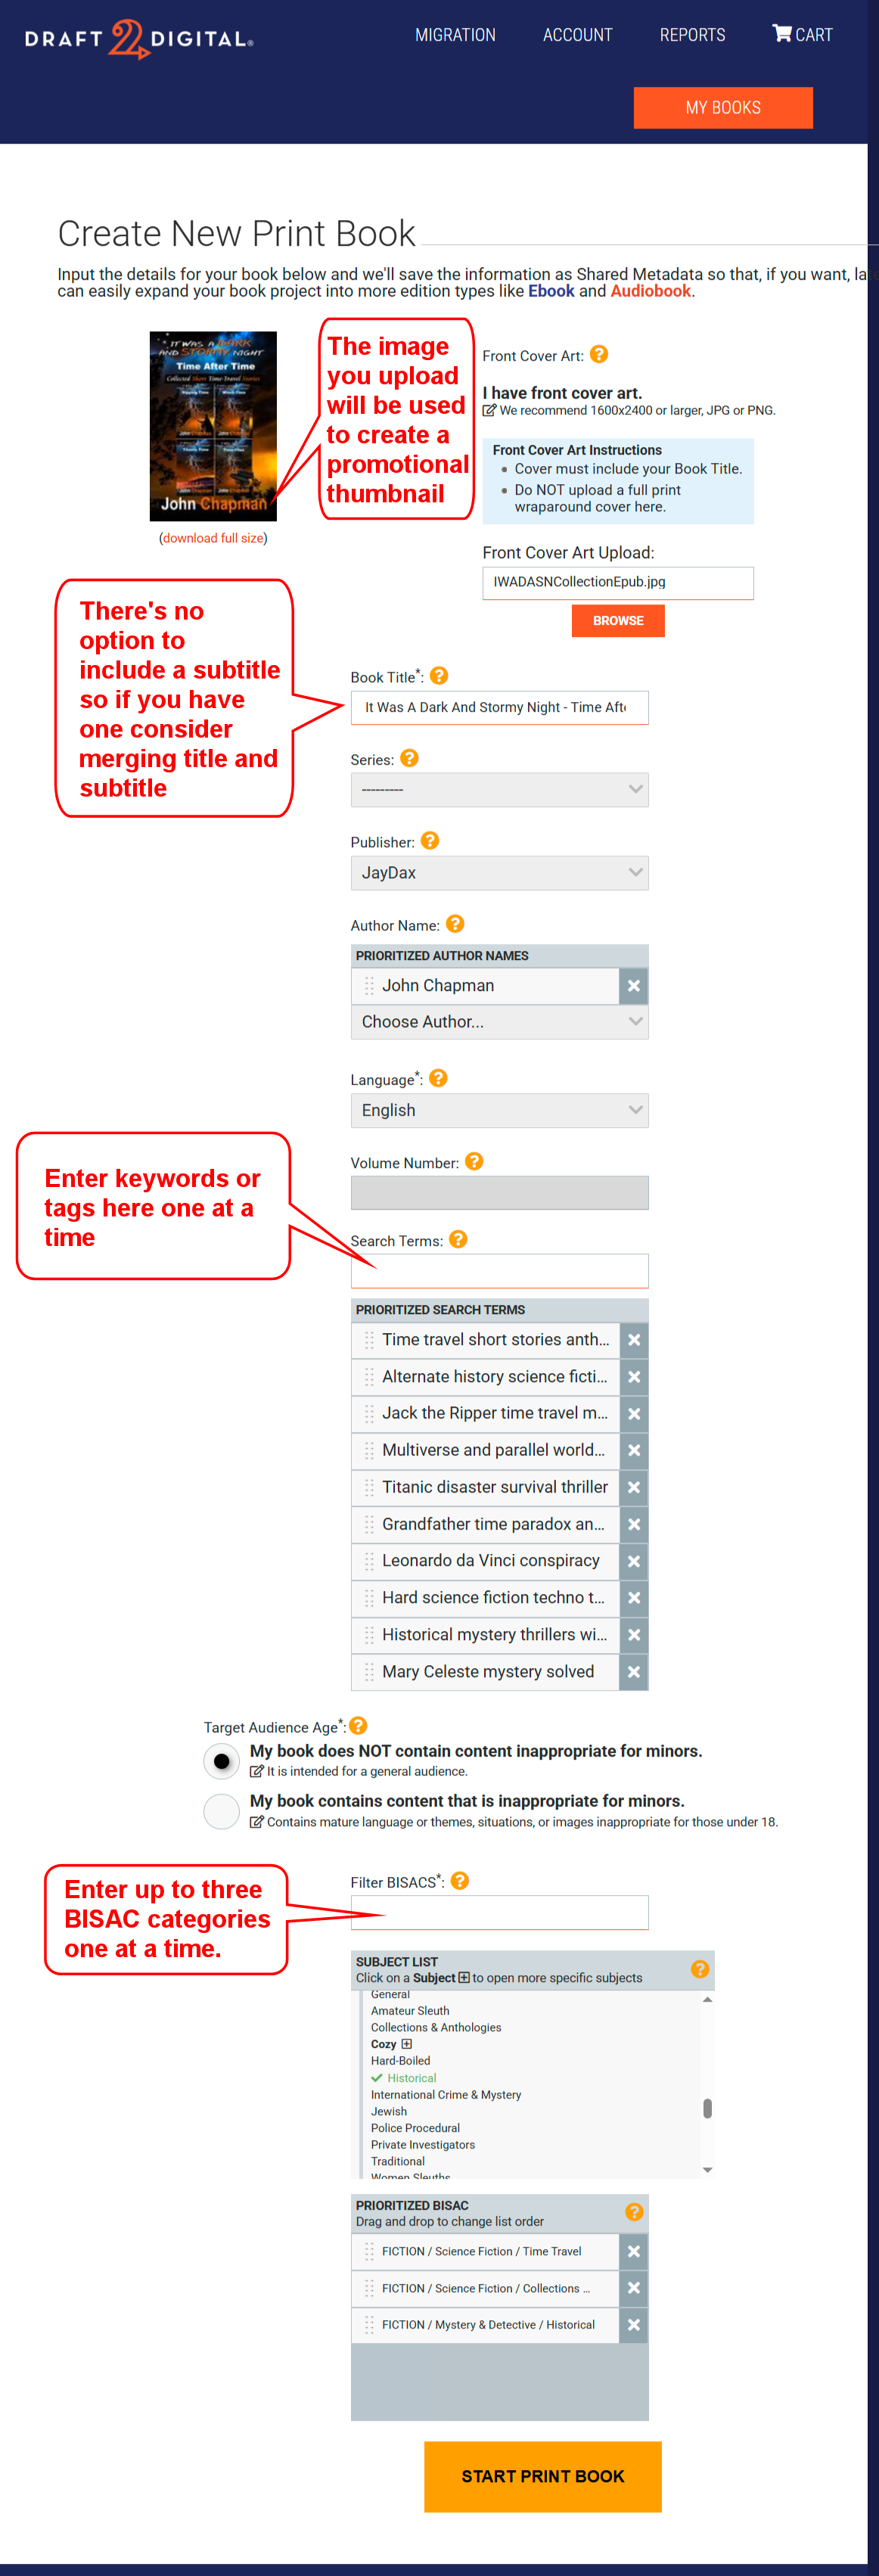
- Select the button 'I have front cover art' then add the image you have for the front cover of your book. This will be used to produce a thumbnail of the book at e-retailers so if you only have an image showing front, spine and back covers then crop it to size. I've added as an example the front cover of a short story collection.
- Add the title of your book. There isn't a subtitle field so if one is essential add it as part of the title. In my case I've used 'It Was A Dark And Stormy Night - Time After Time' rather than just 'Time After Time'.
- If your book is part of a series then enter the series name.
- If you have a publisher, you would enter it next. If you leave this blank then your name will be used. In my case I entered the publisher as 'Jaydax'.
- Next enter the book's author/s. If you have multiple authors then the order you list them in will be what is displayed. Use pen names if you must but it's much simpler to use your real names.
- Enter the language the book is written in.
- If the book is part of a series then enter the series/volume number. This should be a whole number. If you later revise the book you can add a single decimal point to show revisions e.g. 1.1
- Next add the search terms/keywords you have worked out in order of priority. If you have not already looked at the page on that - do so now before you waste time. Amazon allows only 7 keywords but other retailers allow more. For my book of short time travel stories, I use 10 in this box.
- Check the appropriate button for with or without mature content.
- Next select your book's BISAC category/s. BISAC stands for Book Industry Standards and Communications. It's the category your book would be placed under in a library catalogue. Probably the easiest way to find it is to use the subject list D2D offers. In my case I chose 'Fiction / Science Fiction / Time Travel' and a second category of 'Fiction / Short Stories (single author)'
- Once you are happy with your selections click the START PRINT BOOK button to go to the next step.
If you find this guide useful...
Can you help me out?
If you find these pages useful you can return the favour by downloading a FREE ebook from Amazon - even if you don't read it, it will help our rankings! I think you'll probably like it though.
It's the first book of a series of 9 books (so far) which tell the story of how life on Earth was saved from a cataclysmic extinction when a rogue planetoid collides with Earth in 7141. This first book deals with how humanity was made immortal, giving us the incentive to do something about an event so far in the future.
Take a touch of humour, add some genetic science and nanotechnology. Steep with conspiracy and stir in murder and despair. Season with romance between three people in a secret location. Garnish with morality.
The result is 'Immortality Gene', the first in a novel series by John and Shelia Chapman. The ebook of book 1 is mostly FREE at multiple retailers but NOT free at Amazon where it's 99¢/77p.
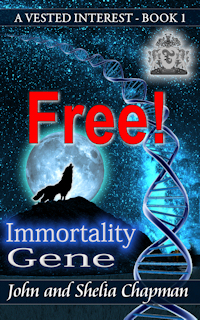
Get it from your favourite store but if it's not free there then we suggest you spend a penny more and get the first three ebooks of the series for $1.00/78p. Here's the link for that
Messed up?
If at any point you feel you've messed up your submission and can't fix it then you'll need to delete it and start again.
- At the top right click 'MY BOOKS'
- Find the book you messed up - it's probably the bottom (or only) one
- Click the paperback draft icon
- Scroll to the bottom and click DELETE BOOK then you can start again.
BISAC?
BISAC stands for Book Industry Standards and Communications/ It acts in a similar way to the Dewey library classification system but is focused on retail rather than classification. For authors getting the right BISAC information is as vital as the book's keywords.
As an author you probably will have a good idea of what classification your book will fit in but may have difficulty finding a second or third classification. Try asking an AI for help. Describe your book to it and possibly upload some chapters. Ask the AI "What would the best three BISAC categories be?"
In my case for my short time travel collection I chose:
- FICTION / Science Fiction / Time Travel - an obvious choice
- FICTION / Science Fiction / Collections - also obvious
- FICTION / Mystery & Detective / Historical - Not obvious.
I wouldn't have thought of this last choice but the AI (Gemini) said "This is a powerful choice. Your stories about Jack the Ripper and the Mary Celeste are fundamentally historical mysteries. By selecting this category, you make your book visible to a huge audience of mystery fans who might be intrigued by the unique time travel twist you offer."
Step 3 - Set details and upload your book files
You'll need your book manuscript document produced in Step 1. You'll also need a book description. If you haven't got one yet I suggest you go back and read the page on producing a book description.
Draft2Digital doesn't appear to offer colour illustrations inside books. In my short story collection I had colour illustrations of the individual short stories at the start of each story; boring without the colour so I deleted them. Draft2digital doesn't handle epigraphs positioned opposite title pages very well so I deleted these. Neither does it handle Section break (odd/even pages) well so if you've used these then change them to normal section breaks. Each short story title page should then appear on the right hand side of an opened book. The easiest way to achieve that is to set all chapters to start on a right hand page as in the next step. This unfortunately will produce several blank pages.
I wanted Draft2Digital to produce a contents page for the stories. To make it easier to use I added the short story title before each chapter heading. Most fiction doesn't need a contents page.
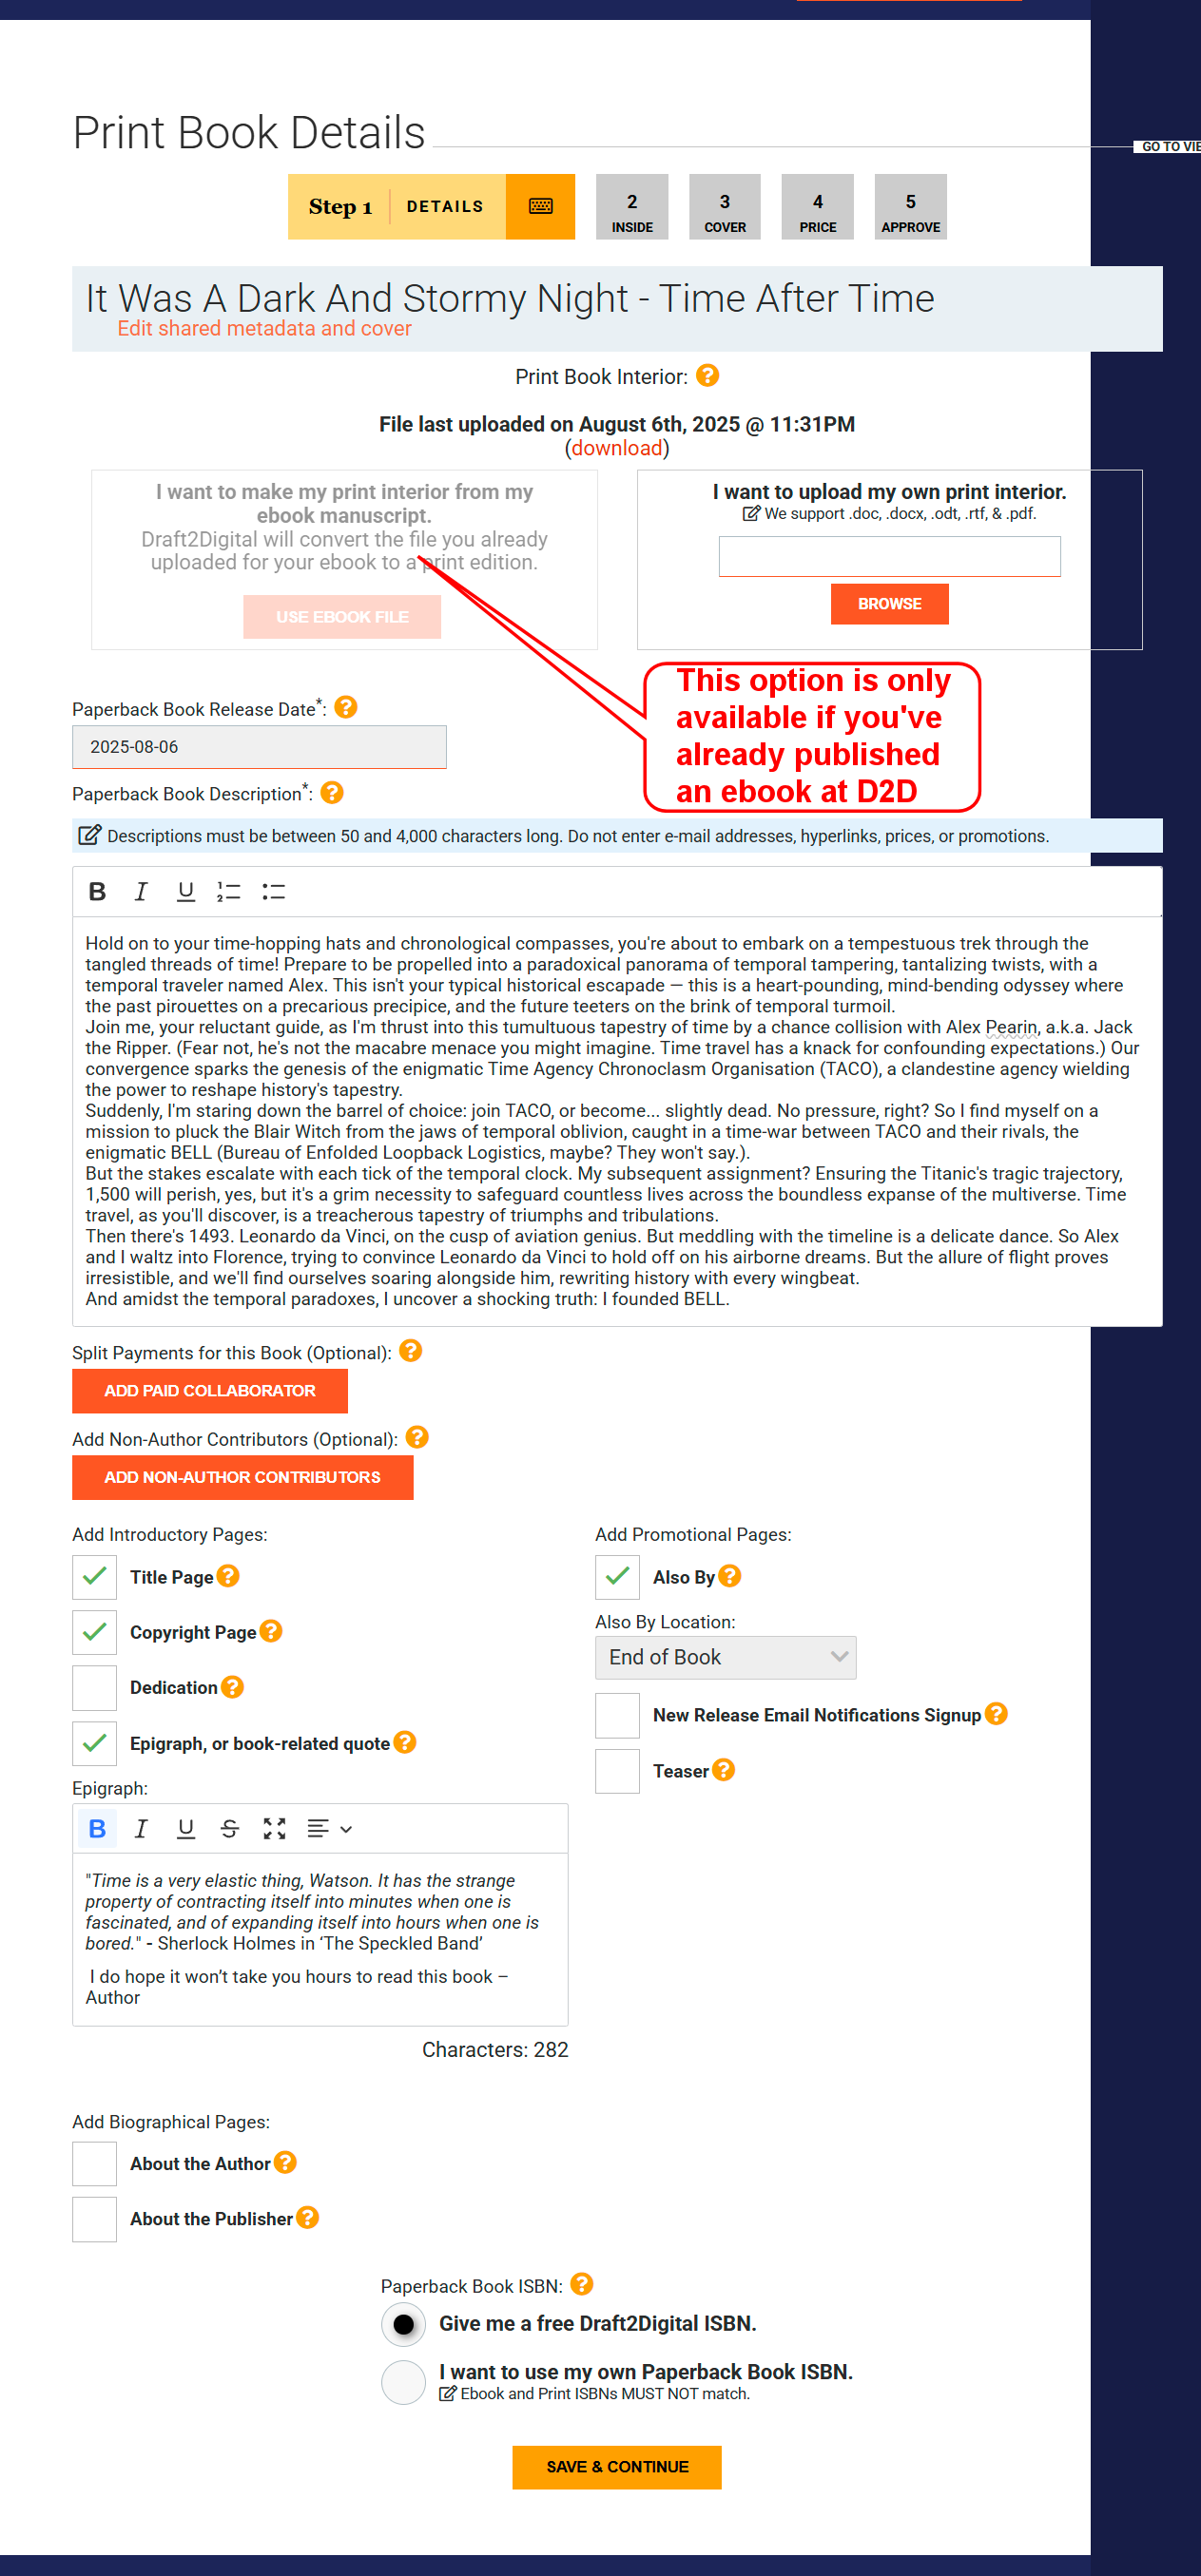
- You're now going to be given a choice:
I want to make my print interior from my ebook manuscript.
OR
I want to upload my own print interior.
This is supposed to be the easy method so, unless you've already created an ebook at Draft2digital, I suggest you choose 'I want to upload my own print interior' and upload a file containing the book's chapters only - You now need to add a book description. This text is crucial in getting sales so make it as enticing as possible. Your aim is to leave readers with an "I have to read that!" impression.
- The next section is for co-authored books and allows you to split royalties earned by the book. If you are the sole author you can ignore it.
- If your manuscript starts at 'Chapter 1' you'll now be given the opportunity to have D2D generate a title page, a copyright page, add a dedication or Epigraph and promotional pages for any other books you have. You can also add an author biography and details about the publisher if you wish. I chose to get D2D's help to produce a title page, copyright page, an epigraph and an 'also by' page.
- You'll need an ISBN (international Standard Book Number). This identifies the book and is used by retailers and libraries. Each one is Unique. You can't use the same one for an ebook. You can buy these online but you can also get D2D to give you a free one. I usually ask for a free ISBN since the only disadvantage is that it identifies D2D as the publisher. ISBN prices vary from £93 for a single ISBN to about £1 each if you buy 1,000. You probably don't plan on writing a thousand books though. In Canada - ISBN numbers are free.
- Once you are happy with this section click the 'Save and Continue' button to preview your book in the next section.
D2D have a formatting guide
It's designed for ebooks but it also applies to paper books. Find it at https://www.draft2digital.com/blog/the-pocket-guide-to-ebook-layout/
Your book description
Writing an effective book description can be challenging. It needs to use words that produce an emotional impact and inspire curiosity.
How do you do that?
Well you could do it the hard way by submitting each sentence to a headline analysis program but today there's an easier method. Use an AI.
Give the AI the following instruction:
I would like you to produce a book description which has a strong emotional impact and encourages readers to obtain the book. The initial sentences of the description should have an especially strong impact. The description should be based on the first three chapters of the book which I will append in sections. Do not submit the description until you see the tag [end chapter three]
Then send the text of the first three chapters using this format:
[start chapter one]
[start]
include 2 to 5 pages of your book here depending on your Internet speed
if slow = less text
[stop]
[start]
next 2 - 5 pages
and so on until...
last pages of chapter three
[stop]
[end chapter three]
Of course it does help if your book starts with a strong hook.
ISBN services
United Kingdom
In the United Kingdom, the official source for ISBNs is the Nielsen UK ISBN Agency. They are the sole authorised provider for the UK and its overseas territories. Publishers and self-publishers can purchase single ISBNs or blocks of numbers directly from their website.
United States
The exclusive provider of ISBNs in the United States is Bowker. Through its MyIdentifiers.com service, Bowker offers a range of packages for authors and publishers, from a single ISBN to large quantities.
Canada
In Canada, ISBNs are provided free of charge by Library and Archives Canada (LAC). Canadian-based publishers and self-publishers can request ISBNs through the national library's online portal.
Australia
The official ISBN agency for Australia is Thorpe-Bowker. A division of Bowker. They are the authorised body for assigning ISBNs to publishers and self-publishers based in Australia. Their services, available through the MyIdentifiers Australia website, mirror those offered by Bowker in the US, providing a range of purchasing options for ISBNs and related services.
Step 4 - Preview the book
You'll be given a preview of a simple book layout in the Draft2digital D2D Simple style. There are a number of settings at the right hand side of the page that can be changed.
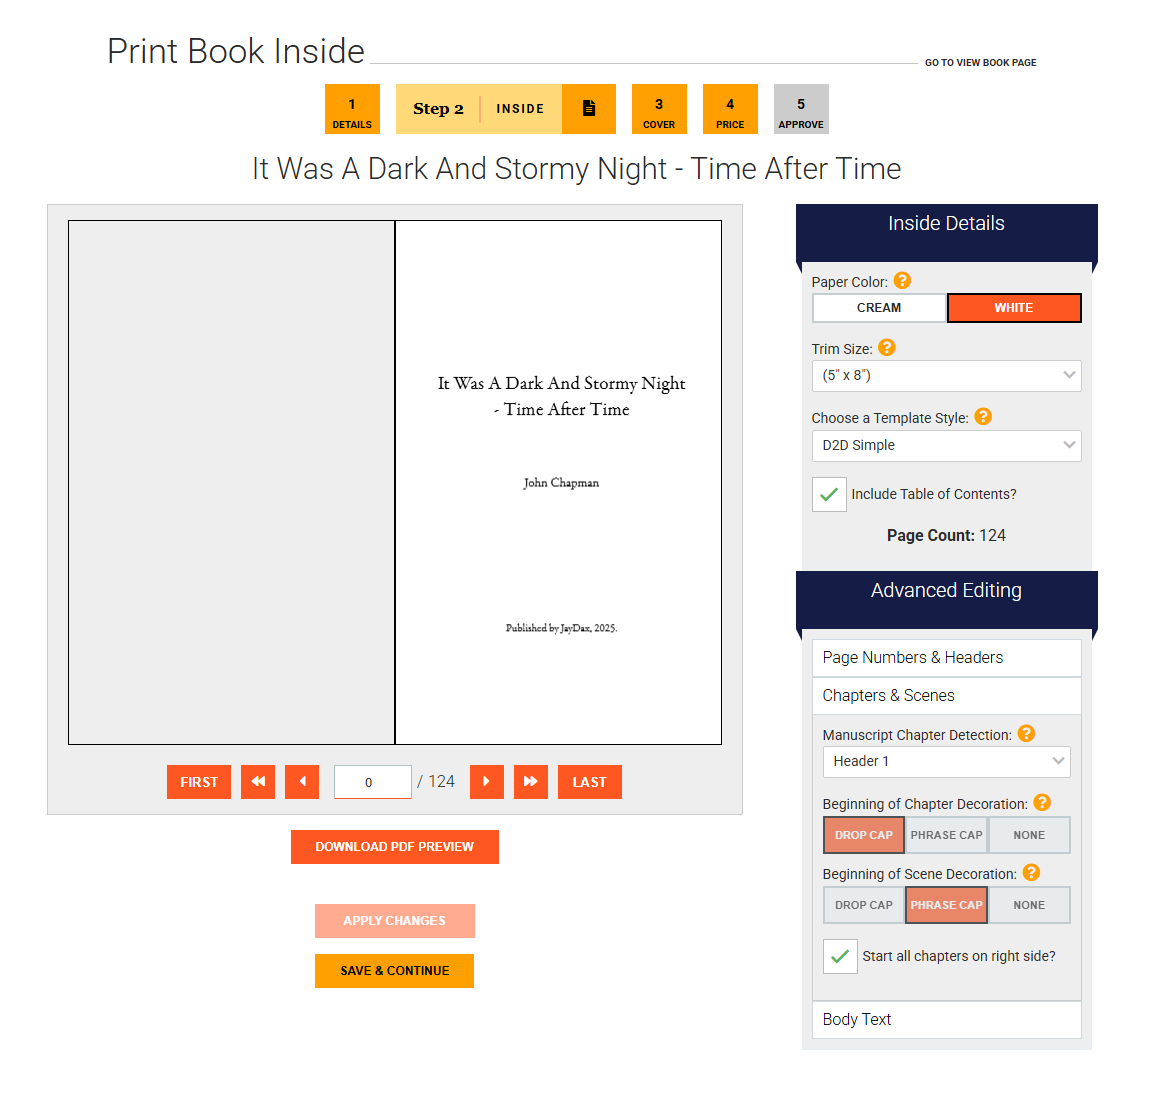
- You can choose between cream and white paper. Cream can be easier on the eyes of the reader and is better for the environment. White is better if your book contains illustrations and is usually a slightly thinner page. I chose to change to white from the default cream.
- You need to set the size of your finished book. The most common size for books is 5½ inches by 8½ inches - Digest size. However if you have a book of less than 40,000 words then I suggest you use the smaller 5 inch by 8 inch Novella size. There are lots of other standard sizes available which I described on this page. Choosing a smaller size will increase the number of pages and that will give readers the impression of better value.
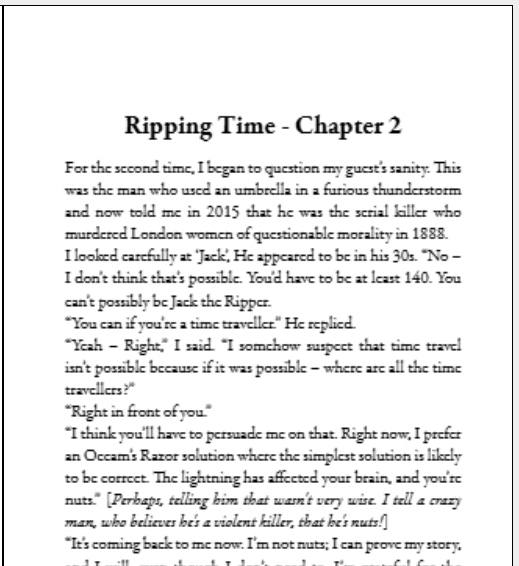
- Draft2digital offers a number of book templates; you don't have to use the D2D Simple default. You can select a different template and then click the APPLY CHANGES button. When you do so, you'll see the chapter headings change and so too the page count will also change. I chose to use the Classy Mystery template which produces a fancy chapter heading, an initial drop capital and increased the page count by two pages. How to select a template? You can step through them one at a time or get a preview here of what each looks like. Hover over the image to get the template name. Click the template to see it full size. Close the window to return here.
- Next decide if you want a contents page. Usually this is only needed for non-fiction, anthologies or books in parts.
- At the right hand side of the page you may need to make some changes to the Advanced settings
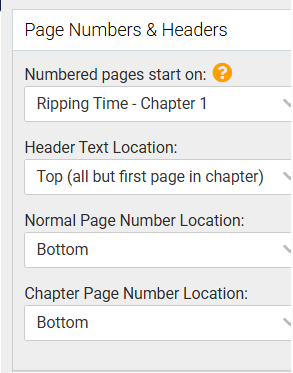
I usually start page numbers at the start of the first page of content and place them at the bottom.
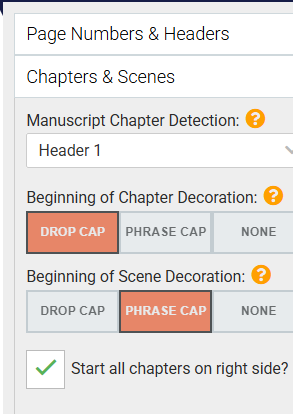
In the Chapters and scenes section, since my chapter headings are always in 'Heading 1' style I select that as Manuscript Chapter Detection. In the Classy Mystery template you can't change the other values in this section.
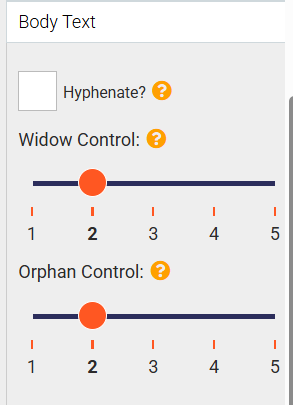
The final 'Body Text' section allows you to hyphenate line endings and control widows and orphans. In my example I chose not to hyphenate and to set widows and orphans to a minimum of two lines of text. If you are still not sure what these are then click the '?' next to them to get examples. - You can step through the book using this page or download a PDF copy to look in greater detail.
- Once you are happy with the chosen template and options click the SAVE & CONTINUE button to set up the cover.
D2D templates
(I have not shown the poetry templates)


Step 5 - Produce the book cover
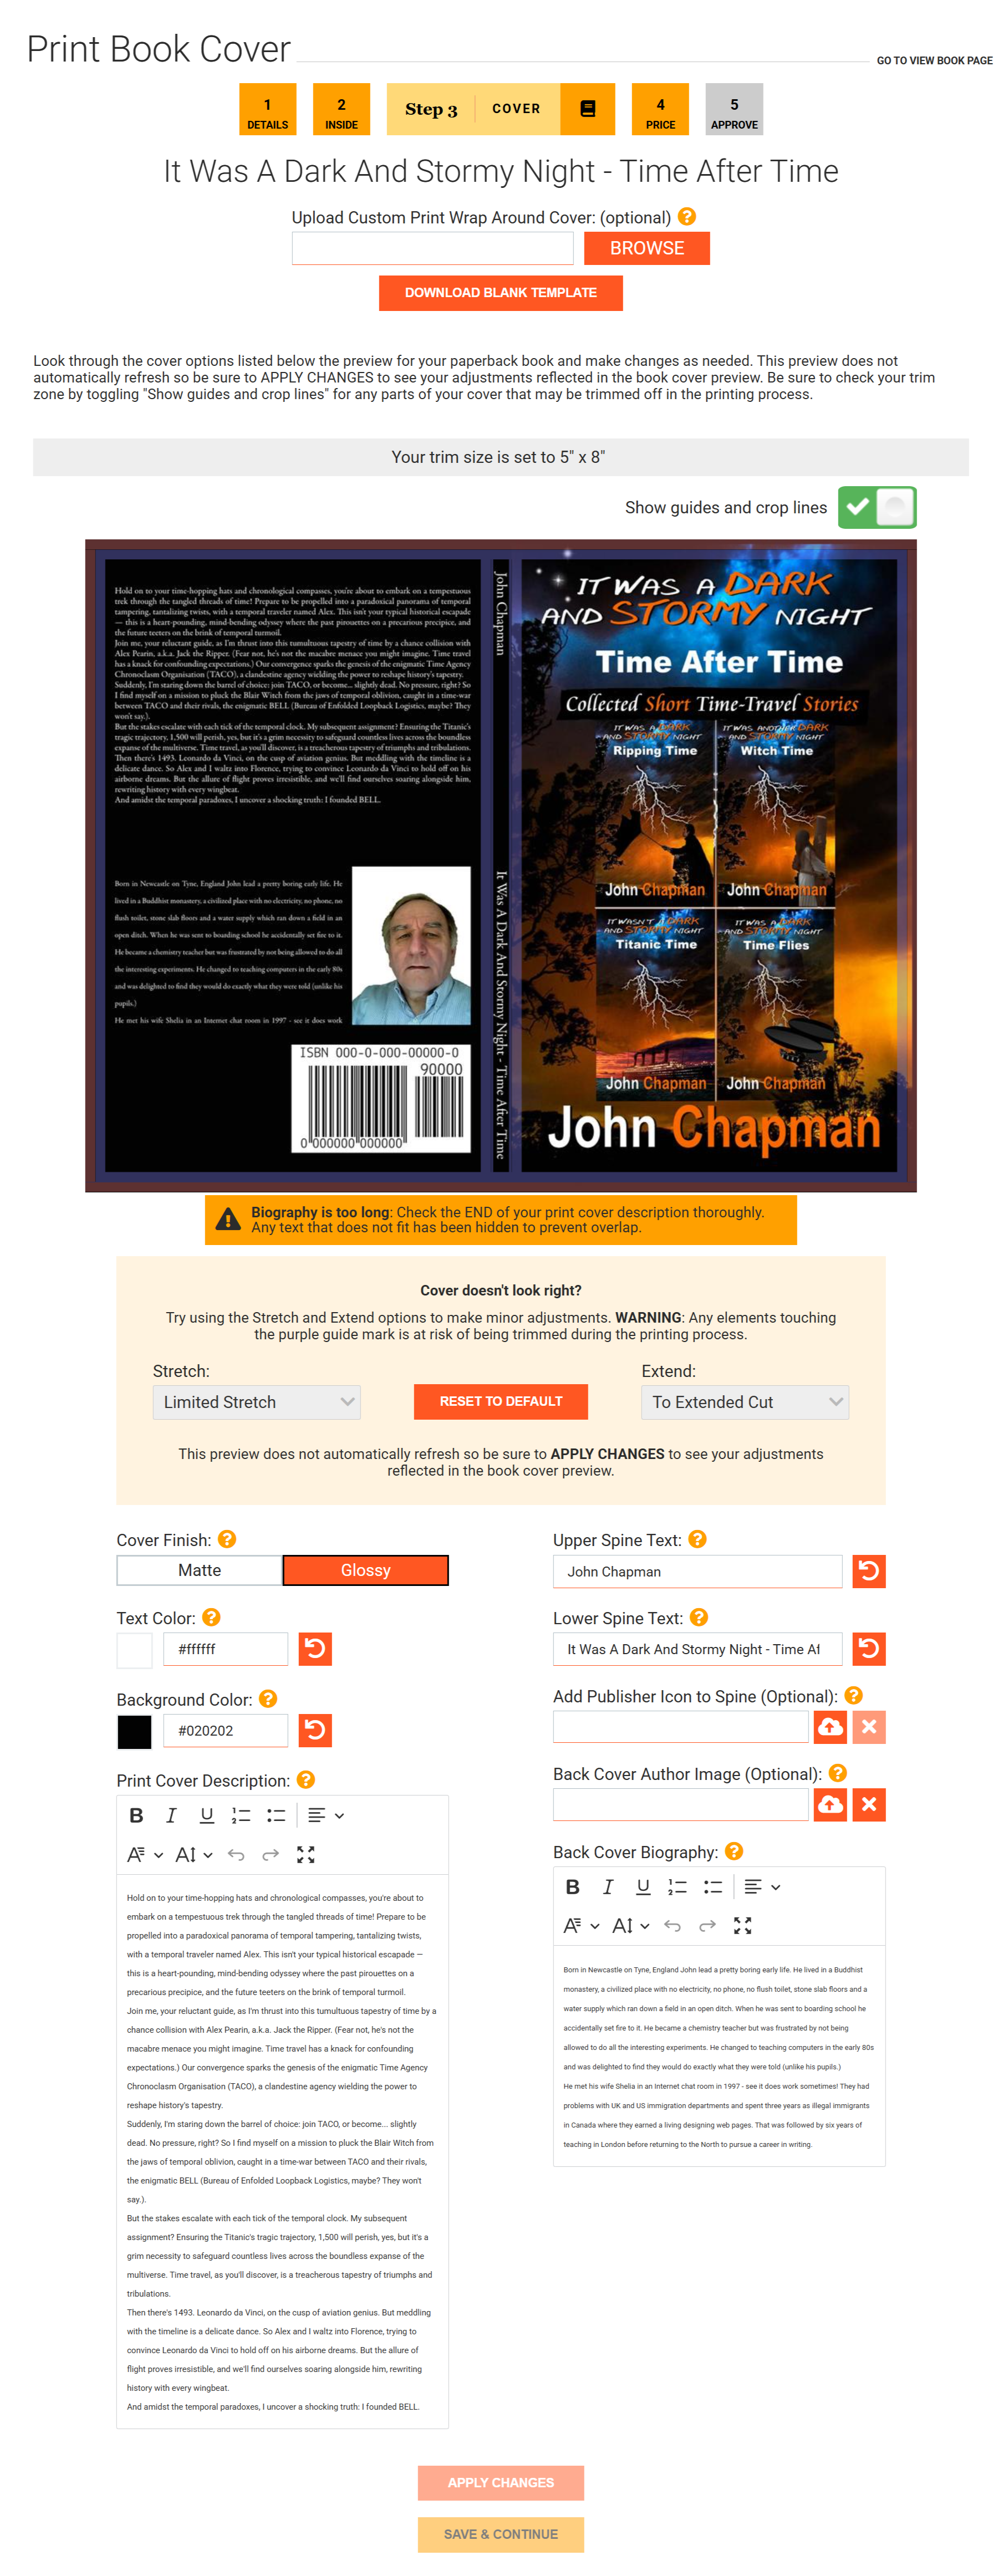
The next page will attempt to put together your front cover, already uploaded, your book description and whatever it knows about you to make a cover. The illustration below shows what it did for me.
There are several customization options to tweek the D2D cover. You can stretch or contract it. You can change the font and add text effects
I can do better than that I think. If you feel the same then your first step should be to download the blank template of the cover as a png file. This should be loaded into the photo editor of your choice and the cover images loaded on top or below it in layers. Make sure you don't accidentally resize the template layer! By making the layers slightly transparent you can see where the edges and forbidden areas are. Make sure you hide the template layer and restore the other layers to no transparency before you save the final image as a png file.
Here's the cover I produced
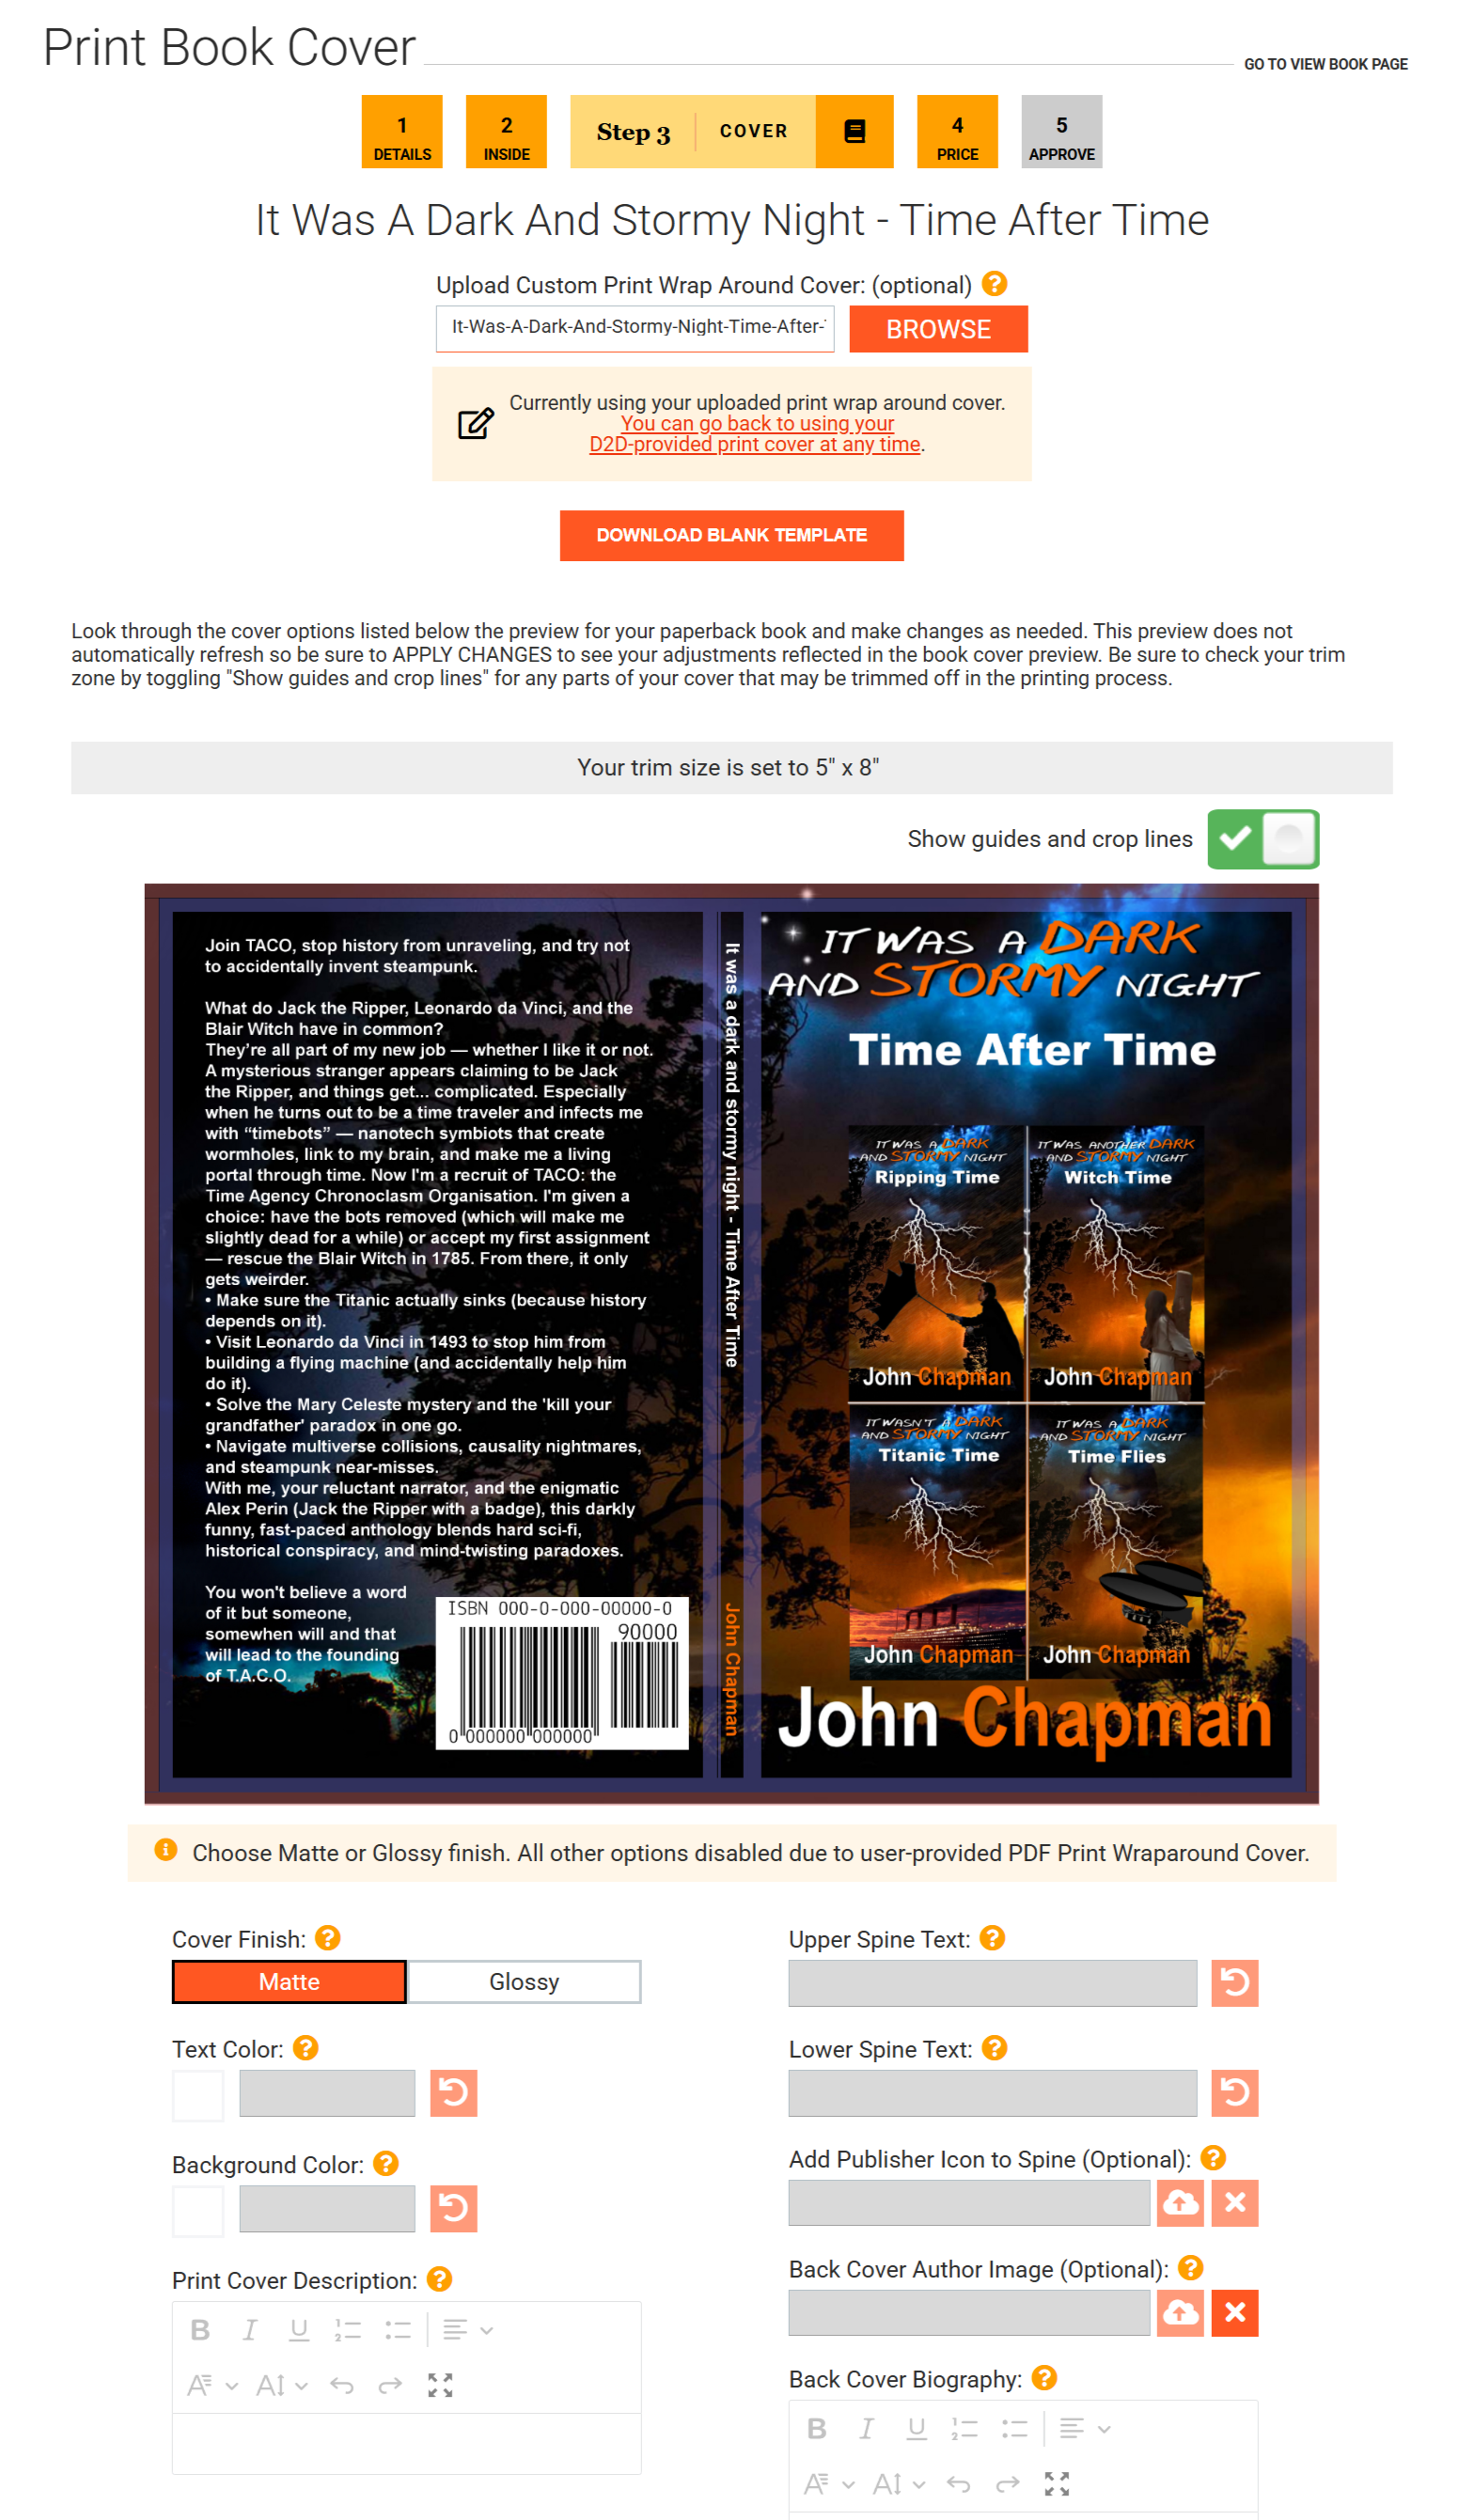
The original description I supplied to D2D was optimized for book discovery online. For the cover I changed it to one more suitable for someone with the book in their hands. It's longer so the author biography had to go to make room for it.
As you can see, the front cover image has been extended to make a background for the text and my name on the spine has been coloured to match the front cover text.
There's only one important extra to set. I find a matte cover looks much better than a glossy cover - it doesn't show fingerprints.
Once you are happy with the cover layout click APPLY CHANGES and then SAVE AND CONTINUE.
Have you seen the guide pages on covers?
- Covers 1 - Recognising a good cover; the effect of colour
- Covers 2 - Rule of thirds and golden ratio
- Covers 3 - Typography
- Covers 4 - Cover images
- Covers 5 - Paperback covers
Did you really want to read my Author Bio?
Well if you must:
Born in Newcastle on Tyne, England John lead a pretty boring early life. He lived in a Buddhist monastery, a civilized place with no electricity, no phone, no flush toilet, stone slab floors and a water supply which ran down a field in an open ditch. When he was sent to boarding school he accidentally set fire to it. He became a chemistry teacher but was frustrated by not being allowed to do all the interesting experiments. He changed to teaching computers in the early 80s and was delighted to find they would do exactly what they were told (unlike his students.)
He met his wife Shelia in an Internet chat room in 1997 - see it does work sometimes! They had problems with UK and US immigration departments and spent three years as illegal immigrants in Canada where they earned a living designing web pages. That was followed by six years of teaching in London before returning to the North to pursue a career in writing.
Maybe you'd like to try a free online interactive adventure story?
Back in 1982 early text only adventure games were being written for home computers. One such game was 'Castle of Riddles' written by Peter Killworth and published by Acornsoft. Now it's been re-written and greatly expanded with added images and sound. Play it on your computer, tablet or even a phone.
Check it out at https://jaydax.co.uk/corr
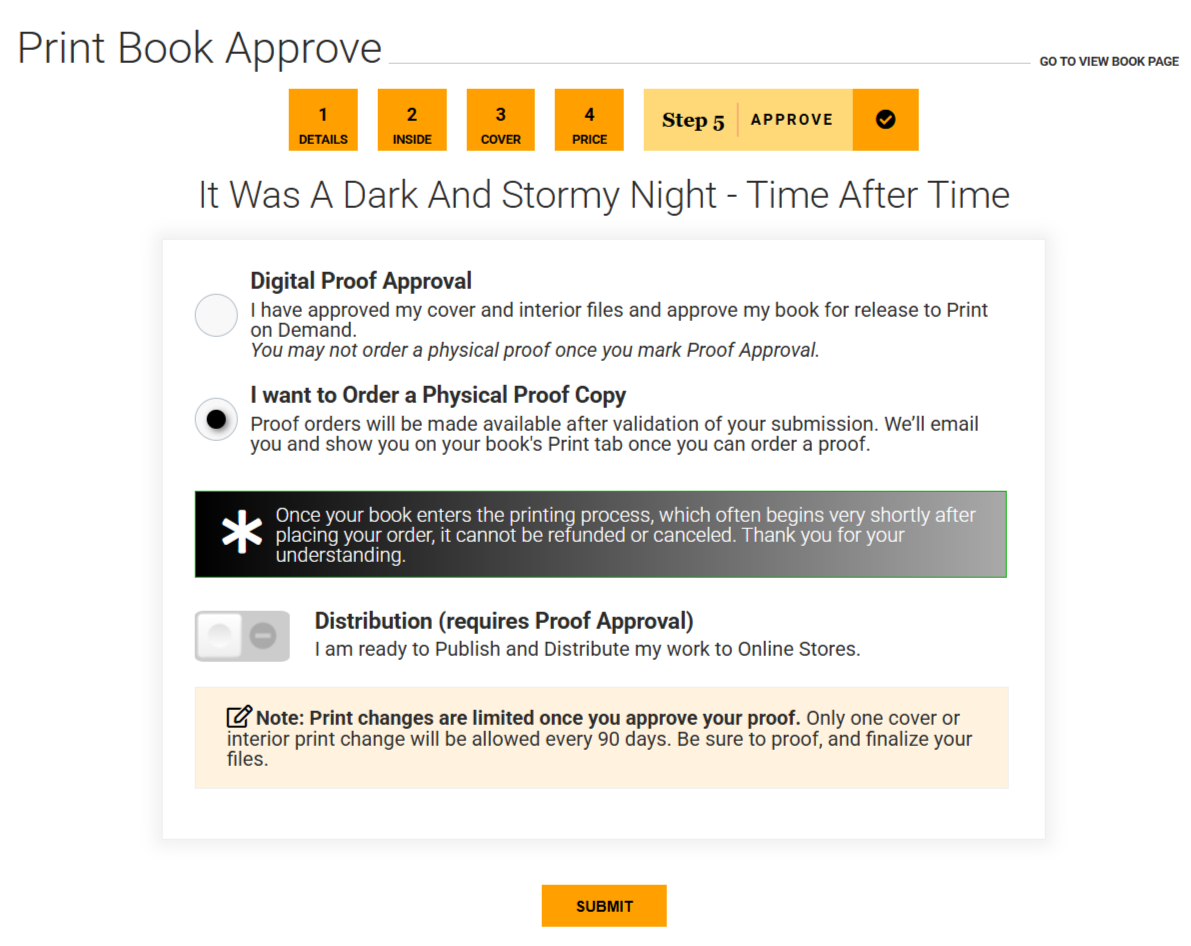
Step 6 - Set the price
Paper books are understandably more expensive than ebooks. Draft2digital will set a minimum price which will earn the author nothing in royalties. It is up to the author to adjust this. Personally I set this to the amount which gets me the same royalty as the ebook edition. I don't expect to sell many print books but on a retailer web page, having a high priced paper book for sale makes the ebook price look attractive.
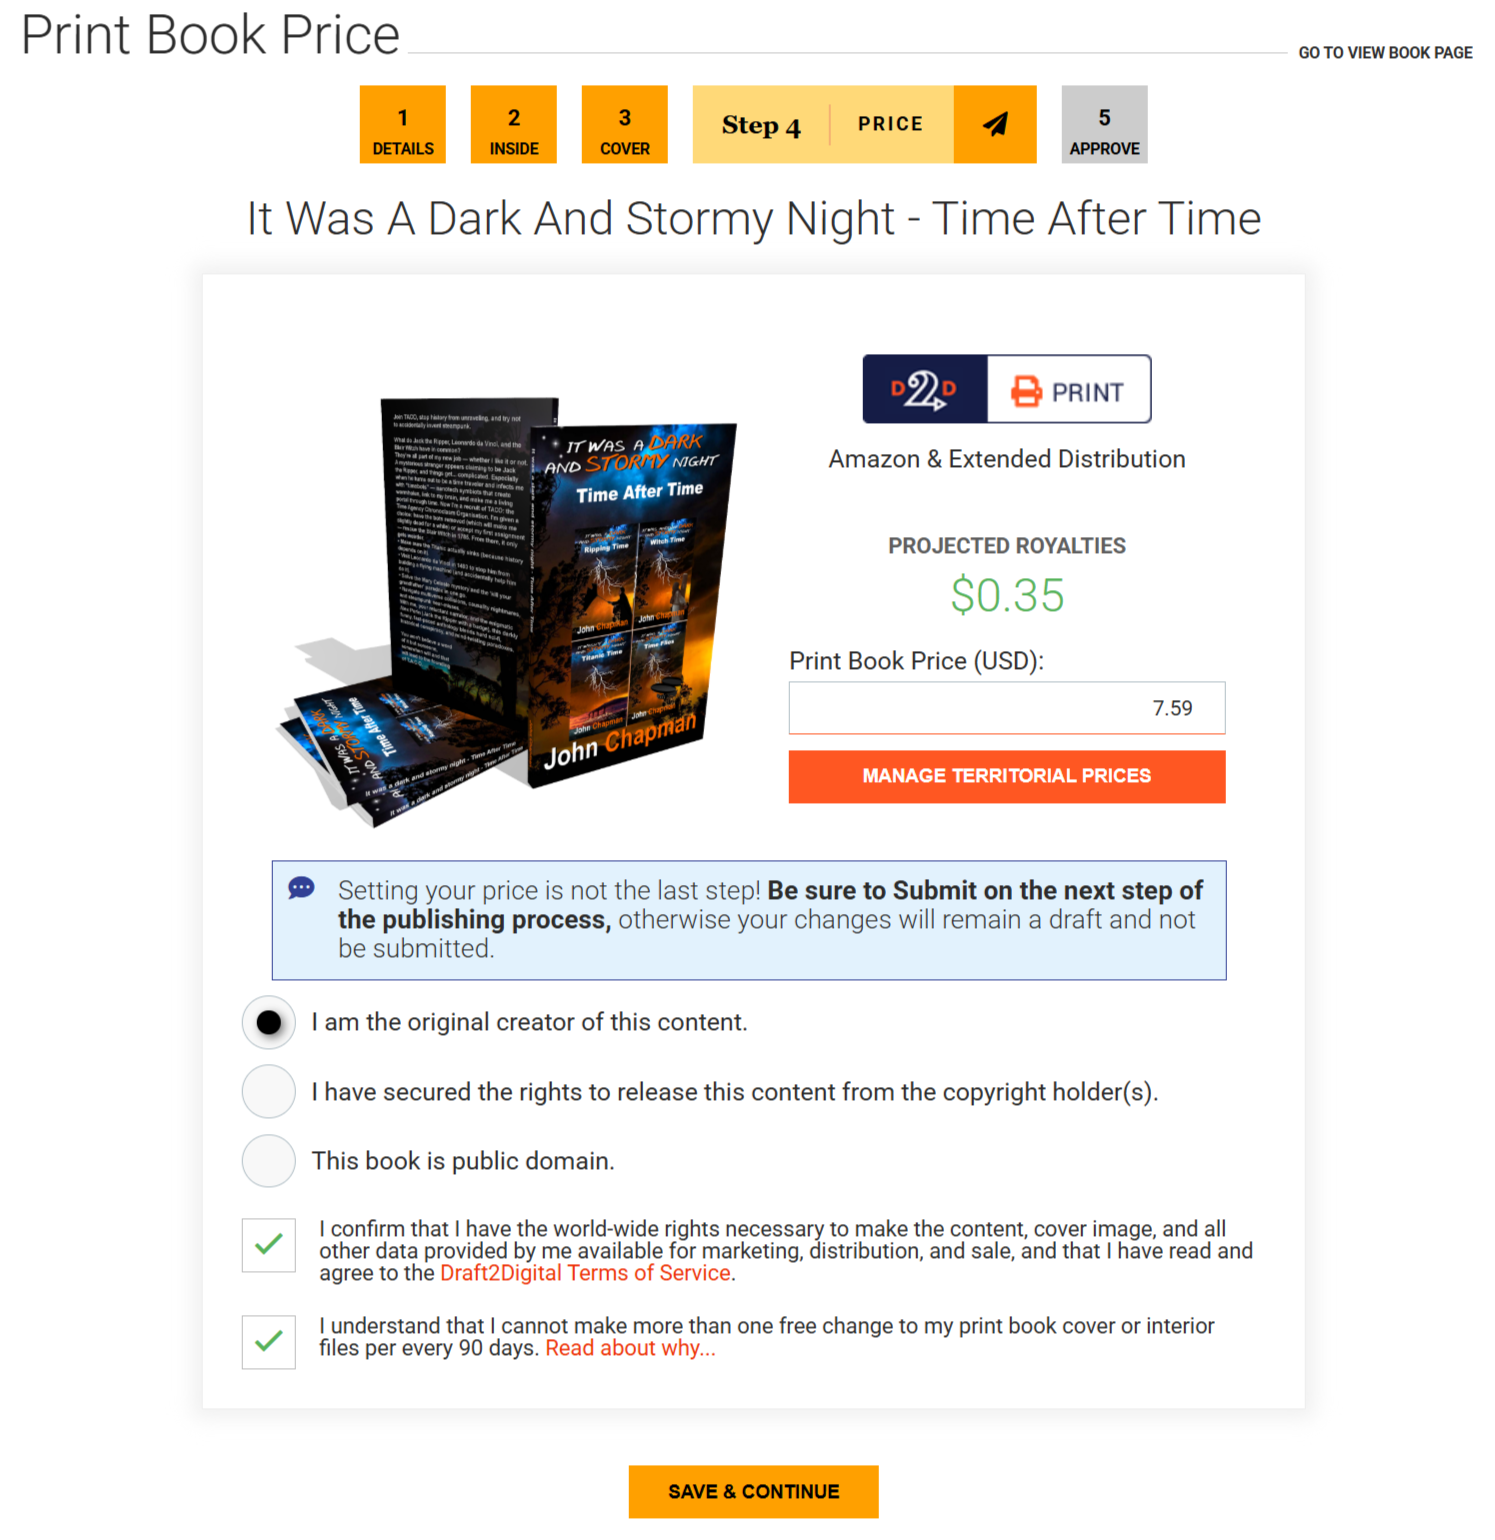
Type in a price and D2D will calculate the royalty you earn.
In this section also you will need to declare that you have the right to publish the book.

Step 7 - Get a proof copy
You can now get a proof copy of your book either by downloading a PDF of it or as a real paperback copy. I make a point of always odering a paper copy since book covers are often not quite what you expect. However if you are in a hurry, then by all means examine the PDF version.